Collect file uploads from customers
The File upload option lets customers attach a file to their order, such as a photo to print, a logo to engrave, or artwork for a custom design. This article covers how to add one, what the limits are, and where to find the file after the order comes in.
File upload is available on all plans.
Add a File upload option
- In the app, go to Option sets and open the set you want (or create a new one).
- Click Add option and pick File upload from the Select an option modal.
- Give it an Option name and an Option label. The label is what customers see, so make it specific: "Upload your photo" beats "File".
- Turn on Required if the customer must attach a file before they can add the product to the cart.
- Use Help text to tell customers what you need from them, for example "JPG or PNG, at least 1000px wide".
- Click Save.
Each File upload option accepts one file. If you need two files, such as a front and a back design, add two File upload options.
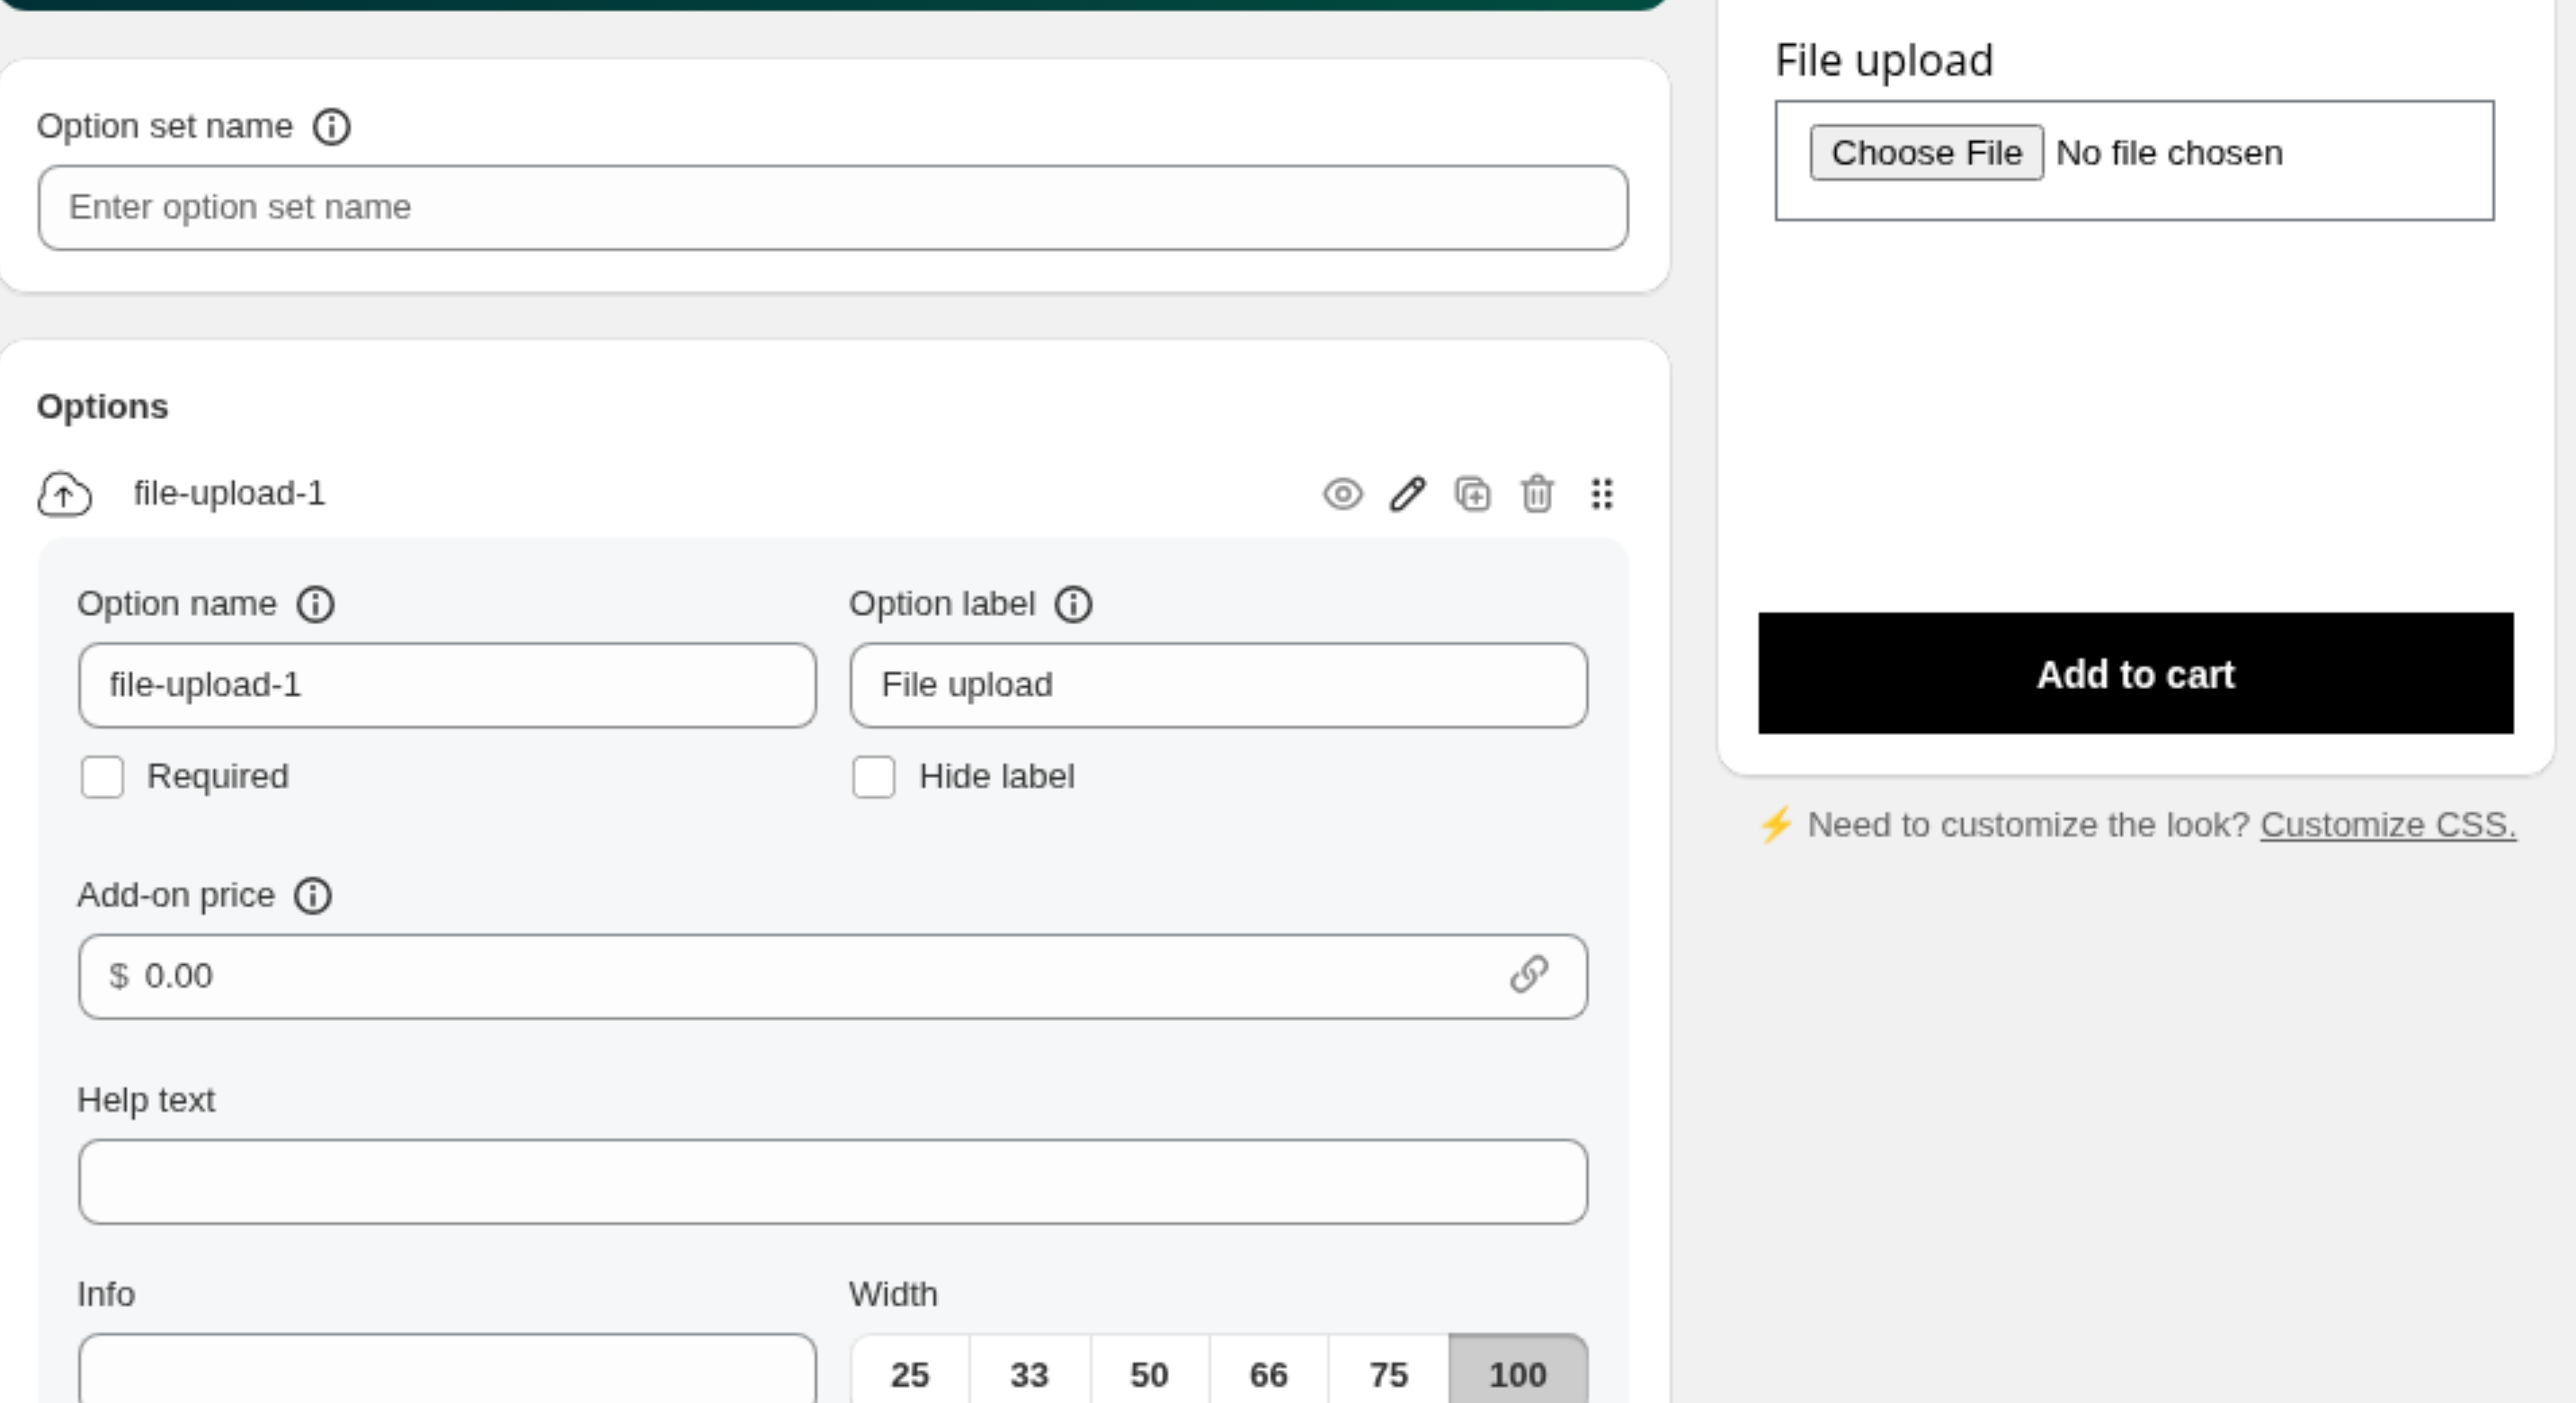
What customers see
Customers get a file picker on the product page. Once they choose a file:
- The option shows Uploading file while the file is sent.
- Add to cart stays blocked until the upload finishes, so a customer can never check out with a half-uploaded file. The shopper sees "Please wait for the file to finish uploading". You can translate it; see Translate your options widget.
- If the upload fails (rejected type or size, a dropped connection, a timeout, or a server error), an error appears under the option, the file field clears, and the customer can pick another file. The default message is "The file could not be uploaded. Please try again." You can translate that string on the Translations page.
File size and type limits
| Limit | Value |
|---|---|
| Maximum file size | 5 MB per file |
| Allowed file types | Images, PDF, design files, archives, and similar. HTML, SVG, XML, JavaScript, PHP, and similar browser-executable types are blocked. |
| Files per option | 1 |
There's no setting to choose allowed types beyond these blocks, so put the types you want in the option's Help text.
A file over 5 MB is rejected with the message "The file field must not be greater than 5120 kilobytes." A blocked type is rejected with "This file type is not allowed." Images rarely hit the size limit because they're resized first (see below), but a large PDF can.
Images are resized automatically
Images are resized before they're uploaded, so the file you receive isn't always the file the customer picked:
- Images wider than 1000 pixels are scaled down to 1000 pixels wide. Smaller images are left alone.
- PNG files stay PNG, so transparent backgrounds are preserved.
- Other image formats are saved as JPEG.
- SVG files are blocked (they can run in the browser), so ask for a PDF or PNG in the Help text if you need vector or print artwork. Non-image files that are allowed (such as PDF) are uploaded exactly as they are.
This keeps uploads fast and comfortably under the 5 MB limit, but it means an uploaded image isn't print resolution.
Find the uploaded file on an order
The customer's file is stored by Optionize, and the option's value is a link to it.
- In your Shopify admin, open the order.
- Find the line item properties on the item.
- The File upload option shows the link. Click it to open or download the file.
The link stays available, so you can come back to it while you fulfill the order. See Track orders and add-on revenue for everything else that's saved with an order.
Related
Still stuck? Message us from the chat widget and we'll help.